Have you ever picked up a store-bought granola, thinking it was a “healthy” choice, only to realize it’s packed with sugar and mystery ingredients? That used to be me—until one day, after yet another bland bite, I thought, Why not make my own?
That’s when I discovered the ultimate game-changer: my homemade vanilla nut granola recipe . It’s crunchy, naturally sweet, and incredibly easy to whip up. Plus, it fills your kitchen with the warm, comforting aroma of vanilla and toasted nuts. Trust me, once you try it, you’ll never go back to store-bought!
So, what makes this recipe a must-try? First, it’s completely customizable—toss in your favorite nuts or add a sprinkle of dried fruit. Second, it’s packed with nutrients, giving you a guilt-free, energy-boosting snack. And best of all? You only need a few simple ingredients.
Grab a bowl, and let’s get baking—you’re going to love this!
Table of contents
Why Vanilla Nut Granola Is a Great Breakfast Choice

Nutritional Benefits of Vanilla Nut Granola
Vanilla nut granola isn’t just a delicious breakfast—it’s a powerhouse of nutrients that fuels your day. Unlike store-bought versions loaded with refined sugars, this homemade recipe is naturally sweetened and filled with wholesome ingredients your body will love.
Here’s why it deserves a spot in your breakfast routine:
- Sustained Energy Release – Oats are rich in complex carbohydrates, which provide long-lasting energy and keep you feeling full longer. No sugar crashes here!
- Protein & Healthy Fats – Nuts like almonds, walnuts, and pecans offer a satisfying crunch while supplying essential fats and plant-based protein to support muscle recovery and brain function.
- Fiber for Digestion – A fiber-rich diet promotes gut health and helps maintain regular digestion, keeping bloating and sluggishness at bay.
- Essential Vitamins & Minerals – This granola is packed with magnesium, iron, and antioxidants, which support everything from heart health to immune function.
- Naturally Sweet & Guilt-Free – Thanks to vanilla, honey, or maple syrup, you get just the right amount of sweetness without unnecessary processed sugars.
The best part? It tastes like a treat but is much healthier than traditional cereals or sugary granola bars. Whether you enjoy it with yogurt, milk, or as a grab-and-go snack, this granola gives you a nutritious start to your day!
How It Fits Into Your Morning Routine
Mornings can be hectic, but this vanilla nut granola makes breakfast effortless and enjoyable. With just a little prep, you’ll have a delicious, nutritious meal ready to grab and go.
Here’s how it can become your new morning staple:
- Meal Prep-Friendly – Make a big batch over the weekend, and you’ll have breakfast sorted for the entire week. No last-minute scrambling!
- Versatile & Delicious – Enjoy it in countless ways—sprinkle over creamy yogurt, pour some into a bowl with milk, or snack on it straight from the jar.
- Perfect for All Ages – Whether you’re packing a lunchbox for kids or fueling up for work, this granola is a hit with everyone.
- On-the-Go Convenience – Running late? Scoop some into a resealable bag or small container, and you’ve got a portable snack for your commute, office, or workout session.
No more skipping breakfast or settling for processed cereals! This granola makes it easy to stay nourished, no matter how busy your day gets.
Now that you know how simple it is to fit into your routine, let’s dive into making your own batch!
Main Ingredients for a Tasty Vanilla Nut Granola Recipe
Choosing the Best Nuts for Your Granola
The right mix of nuts takes your granola from good to incredible. Not only do they add crunch, but they also provide healthy fats, protein, and a depth of flavor that makes every bite satisfying.
Here’s how to pick the perfect nuts for your batch:
- Almonds – The go-to nut for granola, offering a satisfying crunch and a boost of heart-healthy fats.
- Walnuts – Slightly earthy and rich, walnuts balance out the sweetness of vanilla while adding brain-boosting omega-3s.
- Pecans – A buttery, naturally sweet option that enhances the warmth of the granola.
- Cashews (optional) – For a creamier, milder crunch, cashews bring a smooth texture to the mix.
Pro Tip: Chop nuts into smaller pieces before mixing them in. This ensures an even distribution of crunch in every spoonful.
No matter which nuts you choose, always opt for fresh, high-quality varieties for the best taste and texture. Mix and match to create your own signature blend!
The Role of Vanilla in Enhancing Flavor
Vanilla is the secret element that makes your granola taste great all by itself. For stVanilla is the magic ingredient that elevates this granola from simple to spectacular. It brings a subtle sweetness and depth of flavor that ties everything together, creating a warm and comforting taste in every bite.
Here’s why vanilla is a must-have:
- Natural Sweetness Without Sugar – Vanilla adds a mellow, aromatic sweetness, reducing the need for added sugars.
- Enhances Nutty & Oaty Goodness – It complements the earthy notes of walnuts, the butteriness of pecans, and the crispness of oats.
- Aromatherapy for Your Kitchen – The scent of vanilla combined with toasted nuts and oats makes baking this granola a delightful experience.
- Customizable Intensity – Use vanilla extract for a quick and easy option, or scrape the seeds from a vanilla bean for a deeper, richer taste.
Pro Tip: Mix vanilla with your wet ingredients (like honey or maple syrup) before combining it with the dry ingredients. This ensures every bite is evenly flavored.
With vanilla as the star, your granola will taste just as amazing as it smells!
Creative Ways to Serve Vanilla Nut Granola

Topping Ideas for Yogurt, Smoothies, and Desserts
A vanilla nut granola recipe is great because it can be used in many different ways. To One of the best things about homemade vanilla nut granola is its versatility. It adds the perfect crunch and flavor to a variety of dishes, making every bite more satisfying.
Here are some delicious ways to enjoy it:
- Yogurt Bowls – Sprinkle a handful over Greek yogurt with fresh berries for a balanced and protein-packed breakfast.
- Smoothie Bowls – Blend your favorite smoothie, then top it with granola for added texture and crunch.
- Ice Cream & Pudding – A sprinkle of granola over vanilla ice cream or chocolate pudding takes desserts to the next level.
- Layered Parfaits – Alternate layers of granola, yogurt, and fruit for a visually stunning and delicious treat.
- Oatmeal Upgrade – Stir granola into warm oatmeal or porridge for extra crunch and flavor.
Homemade granola isn’t just for breakfast—it’s an easy way to add a little something special to every meal
Transforming Granola into On-the-Go Snacks
Your vanilla nut granola isn’t just for meals—it’s perfect as a quick snack, too! First, Vanilla nut granola isn’t just a breakfast staple—it’s the perfect snack to take anywhere. Whether you need an energy boost between meals or a healthier alternative to processed snacks, granola is a convenient and satisfying option.
Here are some easy ways to enjoy it on the go:
- Trail Mix – Combine granola with dried fruit, dark chocolate chips, and extra nuts for a quick, nutrient-packed snack.
- Granola Bars – Mix granola with honey or nut butter, press it into a pan, and refrigerate for homemade chewy bars.
- Nut Butter & Fruit – Sprinkle granola over apple slices or bananas topped with peanut or almond butter for a crunchy, protein-rich treat.
- Chocolate-Coated Clusters – Melt dark chocolate, coat granola clusters, and let them cool for a sweet, crunchy indulgence.
- Portable Snack Packs – Divide granola into small resealable bags or containers for an easy, grab-and-go snack.
These simple ideas make it easy to enjoy homemade granola wherever your day takes you.

Storing and Preserving Your Homemade Vanilla Nut Granola
Best Practices for Long-Lasting Freshness
To keep your granola crisp and flavorful, proper storage is key. Follow these simple steps to extend its shelf life and maintain its crunch.
- Cool Completely Before Storing – Let the granola cool fully before transferring it to a container. Storing it while warm can create trapped moisture, making it soggy.
- Use Airtight Containers – Store granola in a sealed glass jar or an airtight container to lock in freshness and prevent it from absorbing humidity.
- Keep It in a Cool, Dry Place – A pantry or cupboard away from heat and moisture is ideal. Avoid storing it near the stove or fridge, where temperature changes can affect texture.
- Portion for Convenience – Divide the granola into smaller containers or resealable bags so you only open what you need, keeping the rest fresh longer.
- Label with a Date – Mark the storage date on your container. Homemade granola stays fresh for up to two weeks at room temperature and longer if refrigerated.
By following these steps, you’ll enjoy crunchy, delicious granola for days to come.
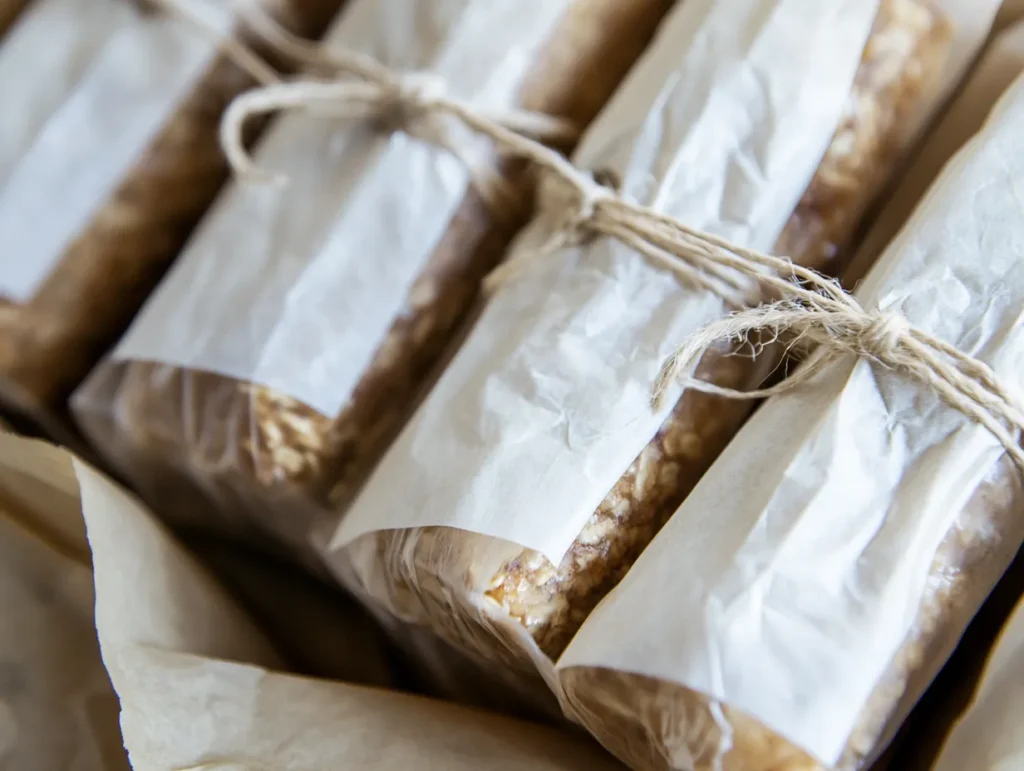
Packaging Tips for Gifting or Travel
Homemade vanilla nut granola makes a thoughtful gift and a convenient snack for travel. With the right packaging, you can keep it fresh while adding a personal touch.
For Gifting
- Choose the Right Container – Use mason jars, resealable pouches, or decorative tins for an attractive and functional presentation.
- Add a Personal Touch – Tie a ribbon around the jar or attach a handwritten label with the ingredients and a short note.
- Pair with Other Goodies – Combine it with a jar of honey, flavored tea, or a wooden spoon for a beautifully curated gift set.
For Travel
- Use Lightweight, Resealable Bags – Portable, zippered pouches or small airtight containers prevent spills and keep the granola fresh.
- Pack Tightly to Avoid Crumbling – Gently press granola into small clusters before packing to maintain its texture.
- Portion for Convenience – Pre-measure single servings for easy snacking on the go.
Whether as a gift or a travel-friendly snack, these simple packaging tips ensure your granola stays fresh, intact, and ready to enjoy!
Ready to crunch into something delicious? Let’s get baking!
Ingredients
Turn simple pantry staples into crunchy, golden perfection!
- Rolled oats (2 1/2 cups / 213g) – The heart of the granola, crisp and satisfying.
- Slivered almonds (3/4 cup / 100g) – Nutty, toasty, and packed with healthy fats.
- Ground cinnamon (1/2 teaspoon) – Adds warmth and natural sweetness.
- Pinch of salt (1/8 teaspoon) – Enhances flavors and balances sweetness.
- Maple syrup (1/2 cup / 120ml) – A natural sweetener that binds everything together.
- Melted coconut oil (1/4 cup / 56g) – Ensures crispiness and adds a hint of richness.
- Almond extract (1/4 teaspoon) – Boosts nutty flavor.
- Vanilla extract (1 tablespoon) – The star ingredient for a fragrant finish.
Instructions
- Preheat & Prep – Set oven to 300°F (149°C) and line a baking sheet.
- Mix Dry Ingredients – Combine oats, almonds, cinnamon, and salt.
- Combine Wet Ingredients – Whisk together coconut oil, maple syrup, and extracts.
- Coat & Spread – Stir wet mix into dry, ensuring even coverage. Spread on a baking sheet.
- Bake & Stir – Bake for 45 minutes, stirring every 15 minutes.
- Cool & Enjoy – Let cool completely for maximum crunch!
Serving
- Snack on it – Perfect as a grab-and-go treat.
- Top it up – Sprinkle over yogurt, smoothie bowls, or ice cream.
- Pair with milk – A wholesome breakfast option.
- Customize it – Add dried fruit or chocolate after baking!
What to Serve with Vanilla Nut Granola Recipe
- What Fruit Goes Well with Cottage Cheese? – A fruity twist can make your granola bowl extra special!
- What Is the Best Topping for French Toast? – Pair your granola with a deliciously topped French toast for a crunchy contrast.
- Cashew Milk Recipe – A creamy, dairy-free way to enjoy your granola in a wholesome breakfast.
- Strawberry Waffles – Crumble some granola over these waffles for the perfect crunchy topping!
Tips & Hacks
- Love clusters? Press mixture before baking and stir less.
- Switch it up – Use pecans, walnuts, or cashews.
- Keep fresh – Store in an airtight container for up to two weeks.
- Boost nutrition – Add chia or flaxseeds for extra fiber.
Nutrition Facts
| Serving Size | Calories | Fat | Carbs | Protein | Sodium | Fiber |
|---|---|---|---|---|---|---|
| 1/2 cup | ~210 | ~10g | ~27g | ~4g | ~30mg | ~3g |
Prep Time
| Prep | Cook | Total |
|---|---|---|
| 5 min | 45 min | 50 min |
Frequently Asked Questions (FAQs)
What ingredient makes granola stick together?
Honey or maple syrup makes granola stick together like magic! First, it acts as a glue to bind oats and nuts. Next, mixing it well ensures every piece gets coated. Then, pressing the mixture down before baking helps it stick even better. Your vanilla nut granola recipe will clump perfectly!
Why is homemade granola not crunchy?
Honey or maple syrup acts as a natural binder, coating the oats and nuts so they form delicious clusters. To enhance stickiness, mix the wet ingredients well before adding them to the dry ones. Pressing the mixture firmly onto the baking sheet before baking also helps create those satisfying clumps.
Why does my homemade granola taste bitter?
If your granola turns out soft or chewy, the oven temperature may be too low. Bake at 300°F (150°C) and stir it every 10–15 minutes for even browning. Cooling is also key—granola crisps up as it cools, so let it rest undisturbed before transferring it to storage.
Why add baking soda to granola?
A small pinch of baking soda creates air pockets in the mixture, making the granola lighter and crispier. It also balances the acidity from ingredients like honey, ensuring a well-rounded flavor and texture.
How to make granola crunchy and not chewy?
For maximum crunch, bake granola low and slow at 300°F (150°C), stirring occasionally. Let it cool completely before breaking it apart. If you love big clusters, press the mixture down before baking and avoid stirring too much while it’s in the oven.
Conclusion
Now that you have the perfect vanilla nut granola recipe, it’s time to make it a regular part of your routine. With wholesome ingredients and a satisfying crunch, this homemade version is healthier, fresher, and endlessly customizable.
Whether you enjoy it with yogurt, milk, or as a quick snack, every bite is packed with flavor and nourishment. It’s also a nice homemade gift for friends and family.
Once you taste the warm, toasty flavors of your own granola, you’ll never want store-bought again. So grab your ingredients and start baking!


